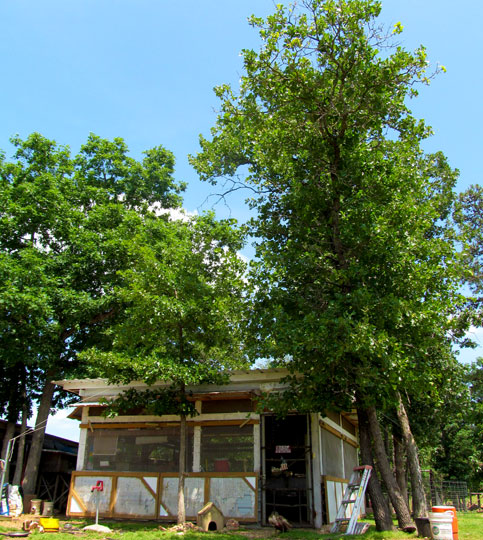
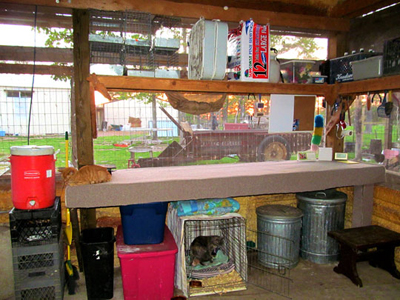
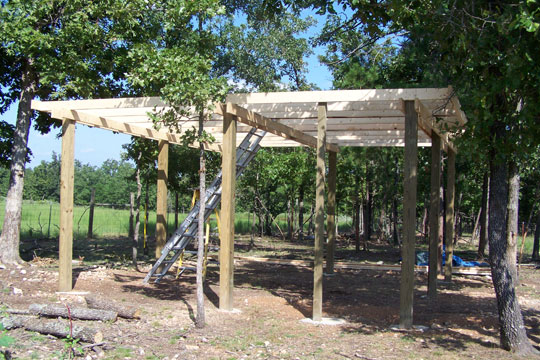
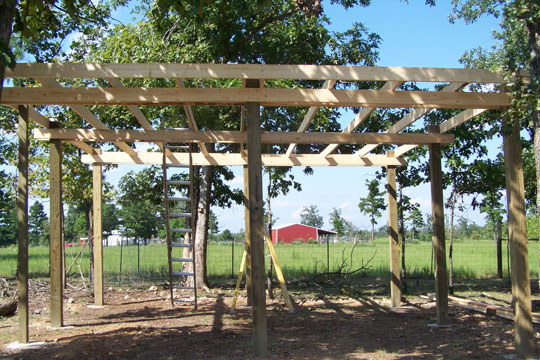
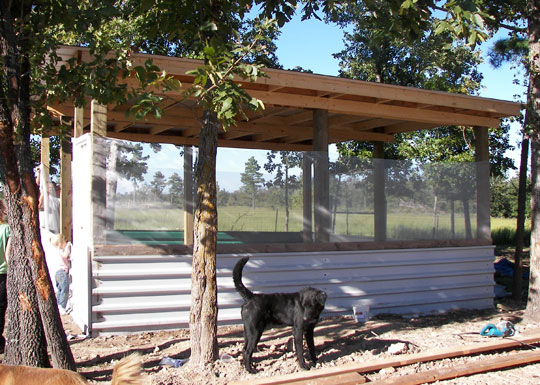
Our rabbitry is about 18'x19' and approximately 9' tall. We built the rabbitry under a lot of trees so that there will be plenty of shade to help with the heat during the summer months. We built the barn similar to pole barn construction.
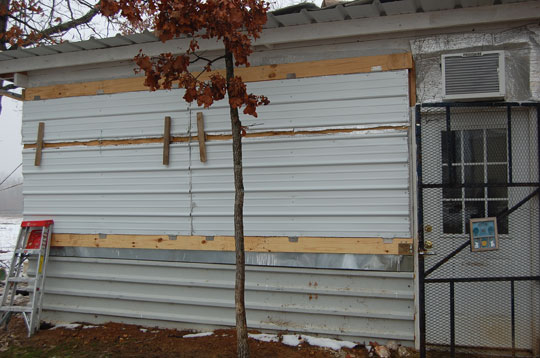
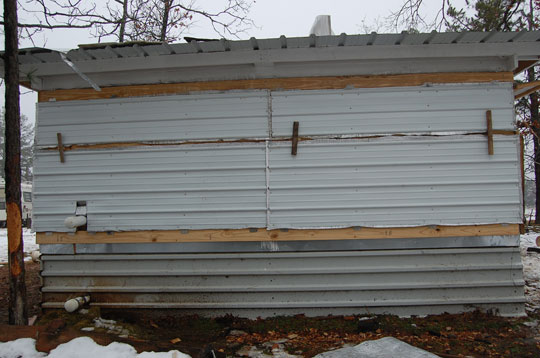
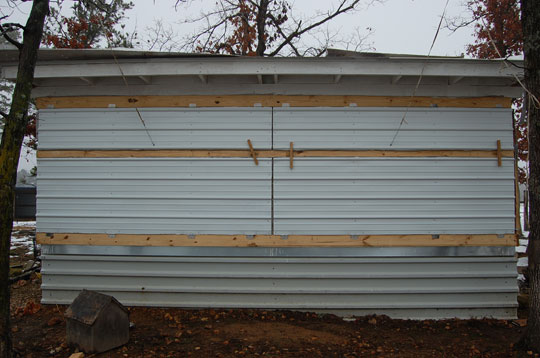
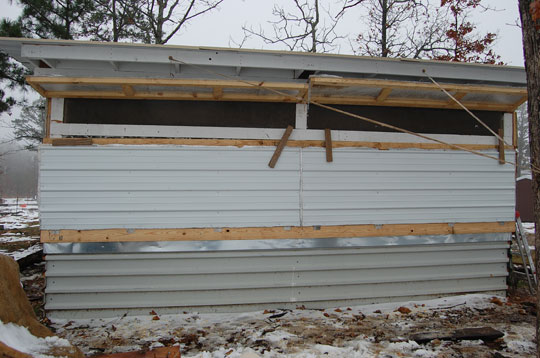
The bottom 3' of each side of the barn is one long sheet of piece metal. The top 6' are covered with wire screen and there are 4 wooden shutters per side of the barn. 2 for the top and 2 for the bottom. I can open and close however many I want depending on how nice the weather is, where the wind is coming from, etc. I'll give more details about how we built the shutters below. Originally we used Canvas tarps (that were waterproof/waxed) to cover the screens. But, those were a nightmare. And due to the high amount of humidity out here in NE Oklahoma, the tarps grew mold on them quickly. They were also a pain when it came to rolling them up and down.
During the hot summer weather, we have an air conditioning unit that we run. It keeps the barn around 20 degrees cooler during and the day and gets it down to the mid 70's to high 60's at night. It's definitely been a life saver in the summer!
In the winter, spring & fall depending on how nice the weather is, we can have all 4 sides of the barn open to allow tons of airflow in. During storms & in really cold or windy weather we keep all 4 sides of the barn shut. We also have foam insulation on the sides and roof of the barn. The shutters are insulated with double bubble insulation and also foam insulation with reflective coating on one side.
Click here to see our rabbitry we had in California!
How We Built Our Rabbitry & Cage System:
Since I get questions of how we built our barn/what we used every so often, I thought I'd put all the info up here. There's also info below on how we built our "flush-kleen" cage system.
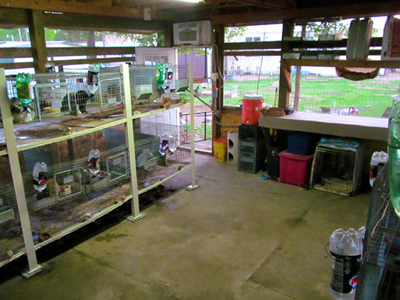
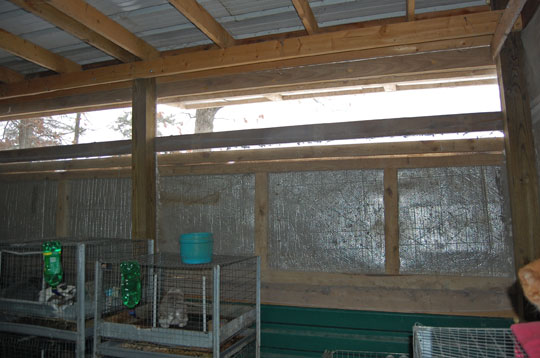
As I said above, the main design of the barn is a pole barn design. We used 12 5"x5" posts for the poles – 3 per side. My barn is about 18'x19'x9'. Then we built the roof using 2"x6"'s. You can see the main design of the roof in the pictures above. We used a single sheet of sheet metal for the bottom 3' of each wall. The roof is all sheet metal too. The top 6' of the sides is covered with wire screen. We used a 1"x4" (you could use anything that was 1" – they are slightly an odd size since we got them from some private party out here) to help hold the wire screen in place – you can see it in the above pictures.
I'd never mess with canvas tarps to roll up & down again. They are a nightmare. So hard to keep down and draft free and then the 16 tarps I had bought brand new, molded out within a year. They lasted a decent amount of time, but I didn't want to spend $400+ every year for something that was a nightmare to open up & down.
So, for the wooden shutters, we used white sheet metal (to help reflect the heat/sun in the summer). My brother built a frame for the shutters out of 2"x4"'s. You can see what the frames look like in the pictures above. We put double bubble insulation (radiant barrier with what looks like bubble wrap in between two layers of the silver stuff) in between the wooden frame & the sheet metal. We also have We had originally put it in our house and then had to take it all down and put in a different kind of insulation. If you were going to use a different kind of insulation or didn't care about the insulation, you could just use the black tar paper or I suppose nothing at all ;).
There are 4 shutters per side. The top 2 are about 2' x half the size of the width of the barn. The bottom 2 are 4' x half the size of the width of the barn. There are four 3 ½ inch hinges per shutter. The bottom shutters open down and the top ones open up.
My brother made a "latch" out of a piece of wood and a bolt to keep the shutters closed – two wooden latches per set of shutters. You can see them in the pics above.
We have a 1 ½" metal pulley attached to the eve of the barn (at the top) for each top shutter (a total of 8). Then we have a thick string/thin poly rope that is attached to the top shutters, goes through the pulley and then is long enough for me to pull and hook onto a nail that's attached to a tree. That's how the top shutters stay open. They are super easy to open & close that way. You can't see it in the pics above, but my brother put a wooden handle on the end of the rope for the top shutters, so that it's easy to pull open or closed. And he also made a loop in the rope above the handle to hook onto the nails/bolts in the trees. We have a lot of trees around my barn so that's why we just put nails in them to hold the shutters open. We would've put a post or something in the ground to keep the top shutters open if we needed to though.
The whole barn has spray foam insulation on the walls and roof. That was about $700 for enough to do my whole barn (about 500-600 sq ft counting all the side walls, etc).
On the wire screen portion of the barn, we have livestock fencing to add extra security, so no little predators can break in.
Now for how we made our cage system.....
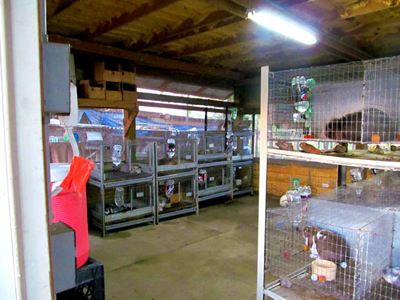
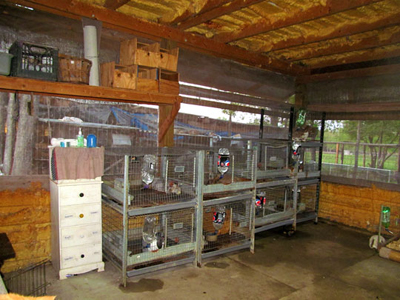
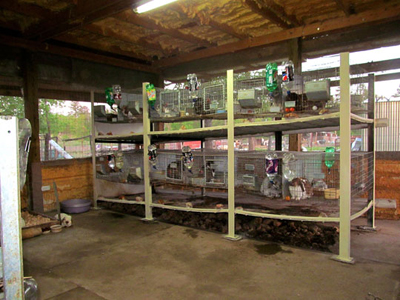
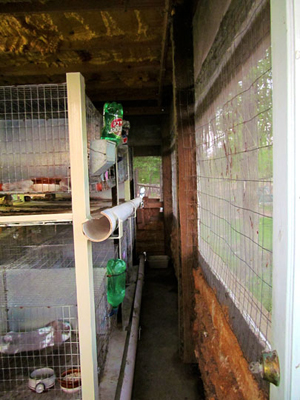
Our "flush kleen" type of cage system. The set-up holds 24 - 24"x24" cages. 12 per layer. The manure drops on the pan and then can be easily rinsed off and down through pipes that empty 10' out the back of the barn. It works great! My cousin made the legs by welding them and he also welded little cage hooks onto them. We then hooked together 4 cages (2 per side) and put them on the legs. The cages can come off of the system (in sets of 4), but it'd definitely be tight getting them off!
We then used a hog panel for the base of the trays and welded that on. The white sheeting we used is fiberglass sheets that are used in showers. It was cheaper and we thought it'd work better than using some kind of metal. We used 4" PVC pipes along one side. My cousin built small little brackets that the pipes could go in and then be screwed into.
We also used small fiberglass edging pieces as a lip on the edge of the tray.
The fiberglass sheets work very well and every few months I just clean them with vinegar (like you can do with dura trays) and it cleans 'em right up. The only thing I'd do different is have the PVC pipe be a little bigger. It works just fine, but sometimes it can be a little tricky getting a bunch of hay rinsed down it.
You can see all the pictures below of our barn construction, the shutter design and our cage system.

The shutters:
A view of the shutters from inside:

Our cage system:
![]()
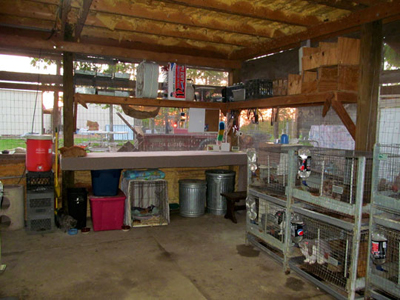
The inside layout of our rabbitry with no cages in it:
![]()
![]()

![]()
![]()